Courses: Introduction to GoldSim:
Unit 10 - Building Hierarchical Models
Lesson 8 - Understanding the Container Properties Dialog
When you insert a Container (or double-click on an existing one), the Container Properties dialog is displayed:

In Lesson 3 we noted that like other elements, a Container has an Element ID and a Description. It also has a number of other options (and tabs) that we chose to ignore. In this Lesson, we will return to this dialog and provide a quick overview of these option and tabs.
To do so, let’s start with a new model, and insert a Container. When you do so, you will note that a new Container has three tabs: General, Graphics and Information.
The default tab is General. Containers have a number of (optional) features. By default, all of these features are off. The most commonly used of these features is one that we have already explored previously in this Unit. If you would have looked at this dialog for one of the localized Containers in the previous Lesson, you would have noticed that the Localization feature was checked. That is, in addition to localizing a Container from the context menu for the Container, you can also localize it (or globalize it) using this checkbox.
The next optional feature is Treat as SubSystem. Treating a Container as a SubSystem enables it to take on some advanced features/properties (Conditionality, Internal Clock, Looping Capability, and Provide Resources). We will briefly discuss some of these advanced features in Unit 18. For most applications, you do not need to be concerned with them.
The Protection feature allows you to “seal” or “lock” a Container. This option will be discussed in the next Lesson.
At the bottom of the dialog are options to save results. By default, a Container does not have any outputs of its own, and the first two checkboxes are grayed out. Under some conditions (e.g., if some of the advanced features discussed above are activated), the Container does have some specialized outputs, and these boxes would be available for editing. The third option (to Enable Time History Result Elements) will be grayed out unless the Container includes some Time History Result elements (in which case it will be checked on by default). You would rarely need to change the default.
The Graphics tab looks like this:
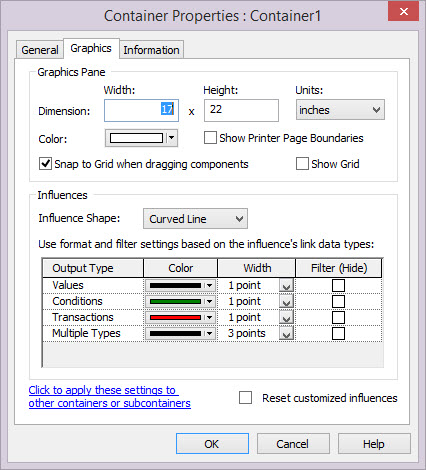
It provides access to options for controlling the appearance of the contents of the Container in the graphics pane. We will discuss some of these options in Unit 16.
The Information tab looks like this:
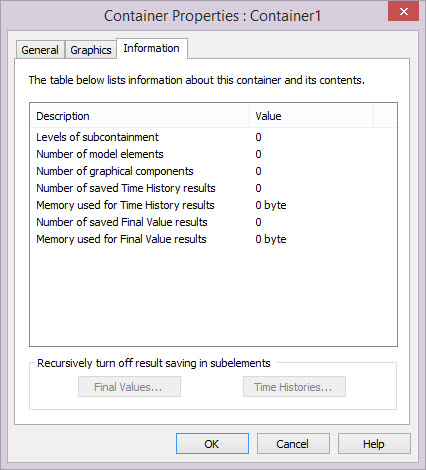
This tab provides some useful summary statistics for the Container, including the number of model elements and graphical components and the degree of subcontainment. The number of levels of subcontainment does not refer to the number of Containers; it refers to the number of hierarchical levels of Containers. For example, if A contained Containers B and C, A would have 1 level of subcontainment; if A contained B, and B contained C, A would have 2 levels of subcontainment. The tab also indicates the total size of the results being saved for all elements within the Container. This information can be very useful in helping you to manage the size of the model file.
Buttons at the bottom of this tab provide the ability to recursively turn off result saving for all elements inside the Container. This can be useful for large models and you can read about it in GoldSim Help.
Note: The properties in the Information tab are of particular interest for the top level container (the Model Container), as they tell you the size of the entire model. You can view the properties of the Model Container by double-clicking on it in the browser.
It should also be noted that the advanced features mentioned above, when activated, add their own tabs to the Container dialog. For example, when a Container is localized, an Exposed Outputs tab is added:
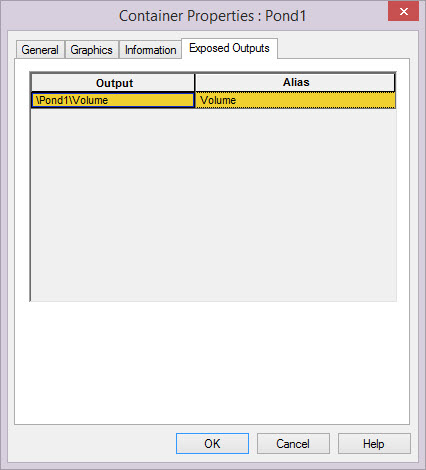
In this particular example, the tab allows the user to define an “alias” for the exposed output (effectively changing its name when referenced outside the Container).
The purpose of this Lesson was to simply provide an overview of the Container dialog. Containers have many optional advanced features, and these are activated via this dialog. When you first get started with GoldSim, you generally do not need be concerned with these advanced features (and hence won’t need to change anything in the Container dialog other than the Element ID and Description). But as you become more experienced with GoldSim, you will likely take advantage of some of these advanced features (you will certainly want to use the localization feature). We’ve already discussed localization. We will provide a brief overview of the other advanced features in Unit 18, and will discuss one of these in detail (Protecting Containers) in the next Lesson.