Courses: Introduction to GoldSim:
Unit 14 - Modeling Discrete Events
Lesson 5 - Exercise: Triggering Multiple Elements
In the previous Lesson, we showed how we could trigger an element (in particular, a Stochastic) using the Triggering dialog. We showed, for example, that we could define “At Stock Test” or “At ETime” to trigger the element.
Imagine, however, that you wanted to use the same “At ETime” event to trigger multiple elements. How would you do that? Obviously, one way would be to recreate that same trigger in the Triggering dialog for each element that you wanted to trigger. However, this seems a bit awkward and redundant. It would be nice if we could just define the trigger once.
The Triggered Event element supports just this. Insert a Triggered Event element now. You will find it under the element category “Events”. The dialog looks like this:

As can be seen, the Triggered Event consists simply of a single button. If you press it, you will see that it provides access to the standard Triggering dialog. How does this help us? If multiple elements have a common set of triggers, all we need to do is enter them in a Triggered Event element. The primary output from that element can then be used to simultaneously trigger all of the elements.
To illustrate this, let’s do an Exercise.
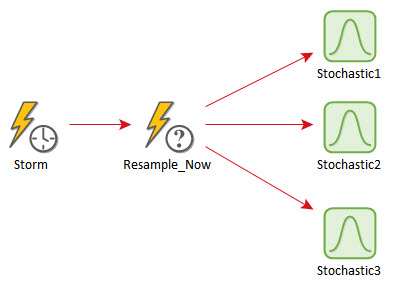
We are going to use a single Triggered Event element to trigger three Stochastic elements:
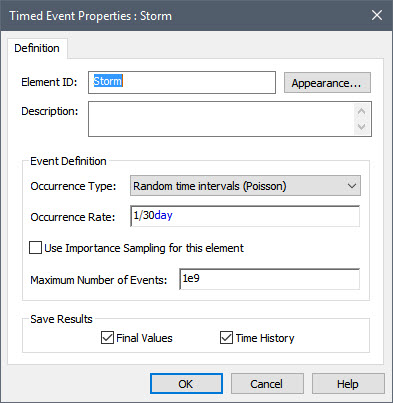
- Create a Timed Event element named “Storm”. Define it as occurring randomly with a rate of once every 30 days.
- Create a Triggered Event element named “Resample_Now”
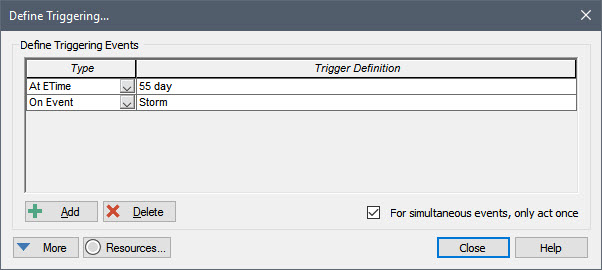
- Define two triggers:
- An “At ETime” trigger equal to 55 days.
- An “On Event” trigger controlled by the Timed Event.
- Create three Stochastic elements, all defined as Normal distributions with a mean of 10 m and a Standard Deviation of 2 m.
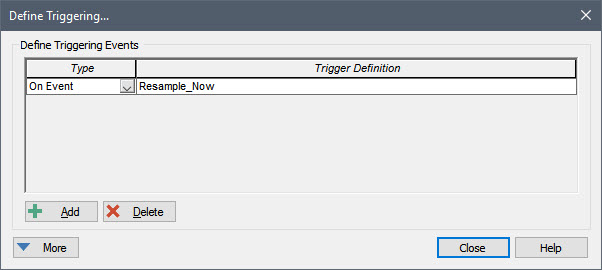
- Use the Triggered Event element to resample all three Stochastics.
Stop now and try to build and run the model.
Once you are done with your model, save it to the “MyModels” subfolder of the “Basic GoldSim Course” folder on your desktop (call it Exercise21.gsm). If, and only if, you get stuck, open and look at the worked out Exercise (Exercise21_ TriggeredEvent.gsm in the “Exercises” subfolder) to help you finish the model.
Your model should look like this:
The Timed Event element should look like this:
The Triggering dialog for the Triggered Event element should look like this:
The Triggering dialog for each Stochastic element should look like this:
If you run the model (for 100 days), and plot any of the Stochastic elements, you should see that it is resampled at exactly 55 days, as well as several other times (the number of times is random, but is most likely to be around three).
The Triggered Event element allowed us to trigger all three elements without having to define the same triggers multiple times (i.e., for all three elements).
Earlier in this Unit we pointed out that a variety of GoldSim elements can be triggered by events, with each element responding to the event (taking a particular action) in a different manner. So far in this Unit, however, the only type of element we have triggered is a Stochastic (which responds to events by simply resampling itself). We used the triggering of a Stochastic to illustrate the use of triggers because it was simple and convenient to do so (you were already familiar with Stochastic elements). Although triggering a Stochastic is indeed important for many kinds of models, other elements can respond to events in ways that are much more interesting and can be used to represent much more complex processes. These will be discussed in the remaining Lessons in this Unit.