Courses: The GoldSim Contaminant Transport Module:
Unit 2 - Using Arrays in GoldSim
Lesson 4 – Creating Vectors
When you define a vector or a matrix, it must be defined relative to a particular set of Array Labels. A set of Array Labels is simply a collection of labels for the items of the array. The labels can be numbers (e.g., 1, 2, …, 10) or names (e.g., apples, oranges, peaches, pears). When you define an element which has an array as an output, you must specify the set(s) of Array Labels upon which the array is based. Vectors require a single set of Array Labels, and matrices require two sets of Array Labels (one for the rows, one for the columns). You define and reference a particular item of an array by using these labels.
To illustrate this, let’s create two vectors right now. Open GoldSim and start with a new model.
You can create (and edit) sets of Array Labels by selecting Model|Array Labels… from the main menu or by pressing the Array Labels button in the Standard toolbar:

The following dialog for defining the Array Labels will be displayed:
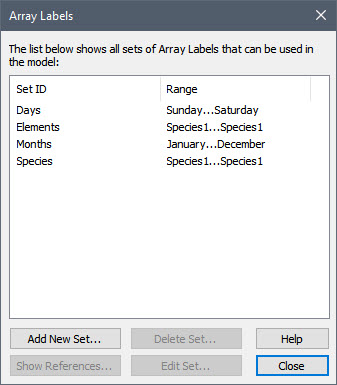
For convenience, GoldSim provides two examples sets of Array Labels: Days has seven items (the days of the week); and Months has twelve items (the months of the year). There are also two additional sets of Array Labels here: Elements and Species. These are automatically added when the Contaminant Transport Module is activated (they would not be present if you deactivate the module). In fact, these two sets are a fundamental part of the Contaminant Transport Module, and we will discuss them in detail in subsequent Units. For now, you can ignore these four “built-in” Array Label sets.
Let’s add a new (custom) set now by pressing the Add New Set… button. Note that a dialog for specifying the type of Array Label Set will be displayed:

You must select whether you wish to define a Named Set or an Indexed Set. In a Named Set, each item in the set has an alphanumeric name. In an Indexed Set, each item in the set is an integer (based on a specified Start Index and End Index).
Let’s created a Named Set. If you press that button, the following dialog for editing the set is displayed:
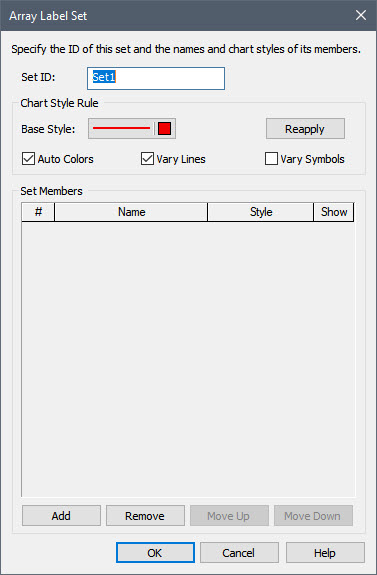
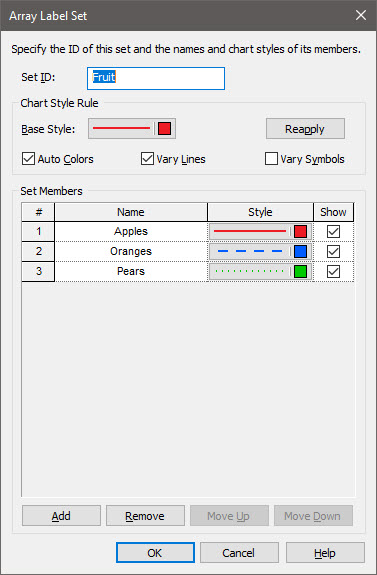
You assign a name (a Set ID) to the new set of Array Labels (by default it will be named Setn). Name this set “Fruit”. You add and remove entries using the Add and Remove buttons.
Note: After you add two or more entries, the Move Up and Move Down buttons become available, allowing you to move entries up or down in the list.
Let’s add three items: Apples, Oranges and Pears. When you are done, the dialog should look like this:
Note: The Array Label editing dialog also allows you to define the Styles that are used when an element based on the set is displayed in a result chart. The Base Style, in combination with the Auto Colors, Vary Lines and Vary Symbols options allow you to automatically generate the Styles by pressing the Reapply button. Alternatively, you can click on any Style in the list to manually specify the Style attributes. As we will see soon, the Show checkbox determines whether or not the item is displayed in result charts.
Press OK to close this dialog. You will note that the new Array Label set is listed:
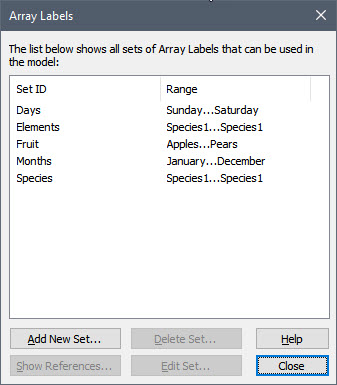
Now press Close to close the Array Labels dialog.
Let’s create a Data element that represents a vector of Fruit.
First, insert a Data element. After doing so, change the Element ID to “Crop”, the Description to “Fruit crop” and set the Display Units to kg.
Next press the Type… button and define the Order as “Vector (1D-Array)”:
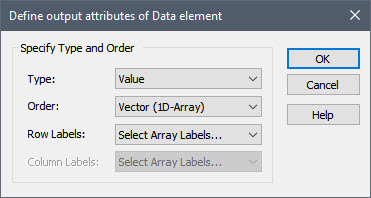
You will note that you are prompted to enter a set of Row Labels. Expand the Row Labels drop list by clicking in “Select Array Labels…”:

The five available Array Labels are listed (the four “built-in” sets and the set of Fruit that we just created).
Note: There is also an option to “Create New Array Labels…”. If you select this, it will open the dialog for creating new Array Labels that we used above.
Select “Fruit” and press the OK button.
Note that the Data element dialog now looks like this:

The input field for the Data element has been replaced with a button (Edit Data…). Press that button now:
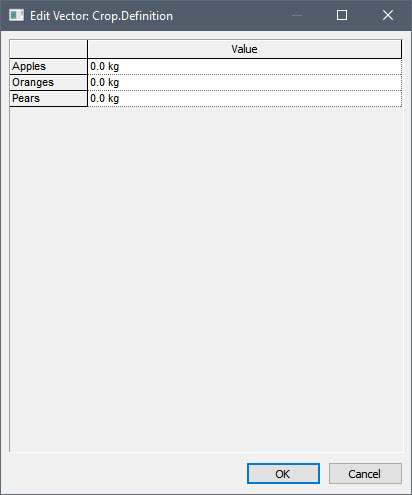
You can see that there is a separate input field for each item of the vector. Enter 5 kg, 7 kg and 10 kg for the three items now, and press OK. Then press the OK button to close the element dialog.
Now left-click on the output interface for the element:
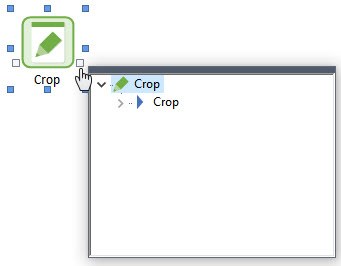
What you will note here is that the Crop element can be expanded in the output interface (by left-clicking on the arrow):
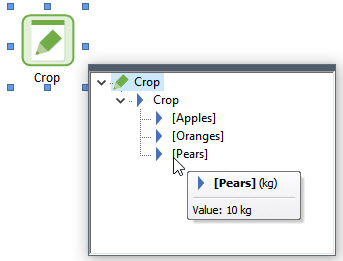
Each item is displayed (in brackets). If you hold your cursor over an item, its value is displayed.
Let’s finish this Lesson by creating a vector in a different way. Instead of using a Data element, we are going to create and define the values for the items of a vector using an Expression element.
Let’s start by inserting a new Expression element. Name it Crop2, and give it Display Units of kg. Then press the Type… button, and define it as a “Vector (1-D Array)” with Row Labels of “Fruit”. The element will look like this:
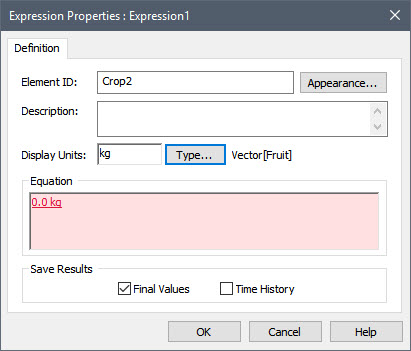
You will note that the input field is colored red. This is because the default entry (the scalar value 0 kg) is incompatible with the type (a vector of Fruit).
We are going to create a vector using a special function called a vector constructor. In particular, GoldSim provides a special array function for creating vectors. Array functions are like other functions provided by GoldSim (e.g., sin, cos, max, log). In which you provide a function name, followed by one or more arguments in parentheses (e.g., log(X), min(A,B,C)). However, they operate on and/or produce arrays.
The vector constructor is structured like this:
vector(Array Label Set, Value1, Value2, …)
where the first argument represents the name of the Array Label Set for the vector you are creating, and the subsequent arguments represent the values (and units) for each of the items.
So, for example, we could create a vector similar to the one we created using the Data element (in this case, it has slightly different values) by entering the following:

Press OK to close the dialog.
Now left-click on the output interface for the element (just like we did previously for the Data element):
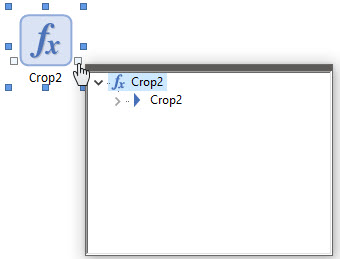
Expand the output in the interface (by left-clicking on the arrow):
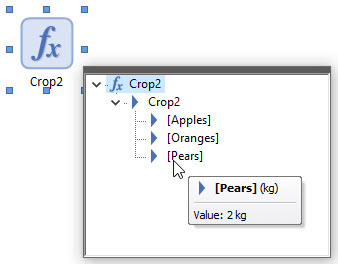
As was the case for the Data element, each item is displayed (in brackets). If you hold your cursor over an item, its value is displayed.
Note: There are also several shortcuts you can use in the vector constructor function. If you just provide a single value, it is assigned to all of the items. For example, vector(Fruit, 10 kg) would assign the value 10 kg to all items. You can also leave out the Array Label set name (in which case the Array Label set specified for the entire element will be assumed). For example, vector(0 kg) would assign the value 0 kg to all items. Similarly, vector(10 kg, 12 kg, 11 kg) assigns values to each item in the vector, as long as the number of items in the constructor matches the number of items in the array.
You can read more about creating arrays in the GoldSim Help file.
Learn More in GoldSim Help: Defining Vectors and Matrices Using Data Elements; Defining Arrays in an Input Field Using Array Constructor Functions
Save this model to the “MyModels” subfolder in the “Contaminant Transport Course” folder on your Desktop (by pressing File|Save from the main menu, Ctrl+S, or the Save button in the toolbar). You can name it Vectors.gsm.
Now that we have created some vectors, we will build on this simple example to see what we can do with them in the next Lesson.