Courses: Introduction to GoldSim:
Unit 13 - Modeling Discrete Events
Lesson 13 - Interrupting a Simulation
Before finishing this Unit, we will cover one final element that responds to discrete signals. This particular element is not used to actually represent a feature or a process in a model. Rather, it is used to help you debug and test complex models as you build them.
The element that facilitates this is the Interrupt element. The Interrupt element is triggered by an event, and responds by interrupting the simulation. When the simulation is interrupted, you can display a user-defined message dialog with options for continuing or pausing (and subsequently aborting) the simulation and/or you can specify that the message is written to the run log.
The Interrupt element has a number of potential uses:
- To alert you to error conditions that indicate a logical problem in a model. For example, if a certain variable should not go below 0 (if it does, it indicates a logic error in the model), you could use an Interrupt element to check for this condition.
- To help you debug a model that is producing a fatal error or showing unusual behavior. For example, if a model produces a fatal error (or starts behaving unusually) when certain conditions are met or at a particular time in a simulation, you could use an Interrupt element to pause the simulation at that point so that you can browse the model and/or save the results up to that point in time.
- To terminate (skip to the end of) a simulation when a certain set of conditions are met. For example, if you were carrying out a Monte Carlo simulation of a project, the project may actually complete at a different time each realization. When the project completes, you could use an Interrupt element to skip to the end of the realization.
- When running GoldSim using the GoldSim Player (discussed in Unit 16), you can use the Interrupt to display status information to a user who is running GoldSim interactively. The message could, for example, prompt the user to pause the model, adjust some of the input parameters, and then continue the simulation.
The Interrupt element is best illustrated by considering a very simple example. In this case, we will add an Interrupt to one of the Exercises we built previously. In particular, we are going to start with a model you should have saved and named Exercise8.gsm. Open the model now. (If you failed to save that model, you can find the Exercise, named Exercise8_Evaporating_Pond2.gsm, in the “Exercises” subfolder of the “Basic GoldSim Course” folder you should have downloaded and unzipped to your Desktop.)
You may recall that this models an evaporating pond. The pond starts empty and eventually reaches a steady state volume of approximately 164 m3. What we are going to do is simply add an Interrupt element that interrupts the model when the volume reaches 102 m3.
Make sure the model is in Edit Mode and insert an Interrupt element (you will find it under the “Events” element category). The Interrupt element looks like this:
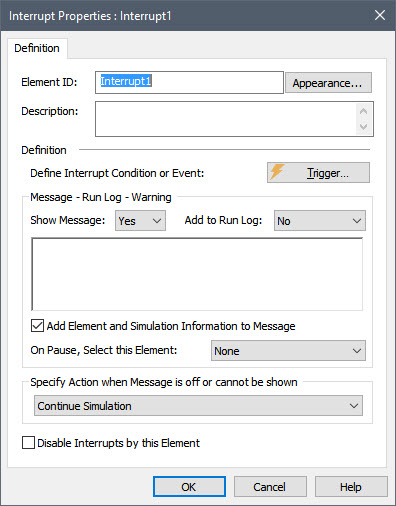
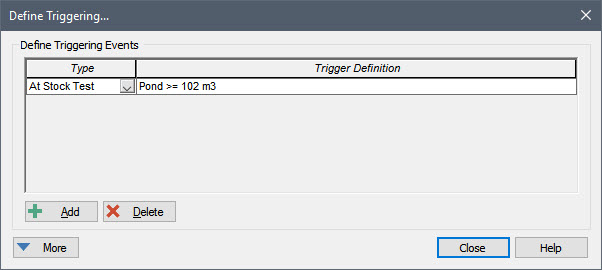
The first thing we must do is give it a name. Let’s simply call it Volume_Check. There is a Triggering dialog where you enter the event(s) that will cause the simulation to be interrupted. We want to interrupt the simulation when the volume reaches 102 m3, so the Triggering dialog should look like this:
When defining an Interrupt, you can specify whether or not a message is displayed by selecting whether to Show Message. The default is Yes, and we will leave it there.
We then need to enter the message to be displayed in the large text box. The message field accepts formatted text (in Rich Text Format). Hence, you can cut and paste formatted text from another application into this box. Within the box, you can also use the context menu for the input field to add formatting. We will display a simple message:
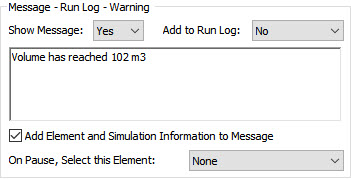
You can also specify whether or not additional information is included in the message dialog when the simulation is interrupted via the Add Element and Simulation Information to Message checkbox. Let’s clear this checkbox.
Now run the model. When you do so, the following dialog will be displayed:
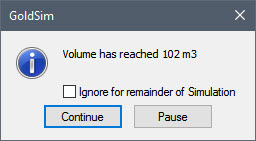
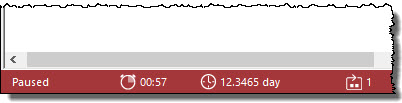
If you press Continue, the simulation will complete. Instead, press Pause. When you do so, the model will be placed in Pause Mode. This is indicated in the left-hand side of the status bar (which also changes color):
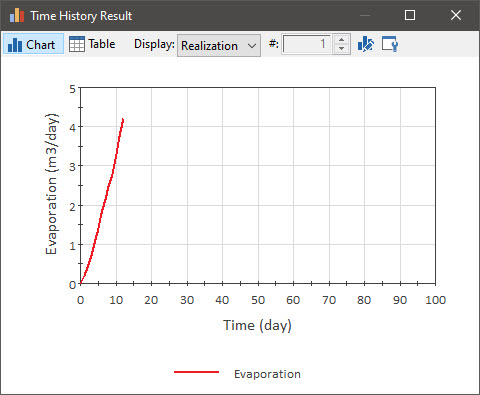
You can now explore the model (e.g., by holding your cursor over elements to see their current value). You can also view Time History results up until that point (by right-clicking on an element and selecting Time History Result… or by double-clicking on a Time History Result element). For now, right-click on Evaporation and select Time History Result… You will see something like this:
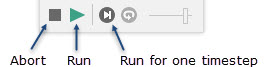
Now that the simulation is paused, you have three options (via the Run Control toolbar):
- You can Abort the simulation (by pressing the Abort button);
- You can continue the simulation (by pressing the Run button); or
- You can move forward one timestep (by pressing the button to move one timestep).
This simple example provides the basic information you need to use an Interrupt element. You can read more about the other features of this element in GoldSim Help.