Courses: Introduction to GoldSim:
Unit 13 - Probabilistic Simulation: Part II
Lesson 5 - Using the Extrema Element
Back in Unit 4, we pointed out that the first step when creating any simulation model is to first clearly state the problem we want to solve, explicitly identifying the input assumptions and exactly what is to be calculated. Now that we have built 20 models (and looked at many more), you are in a better position to think about what kinds of specific questions you might want to answer using a simulation.
If you think about this, what you will find is that often what you are interested in is the highest or lowest values of some specific variables over the course of a simulation. Examples include:
- What is the lowest predicted balance in the bank account (or probabilistically, what is the probability of the balance dropping below a certain value)?
- What is the highest predicted contaminant concentration in the river (or probabilistically, what is the probability that the concentration will exceed a specific regulatory value)?
- What is the highest predicted water level at the seawall (or probabilistically, what is the probability that the water will overtop the seawall)?
- What is the lowest predicted volume of blood at the blood bank (or probabilistically, what is the probability that the blood bank will run out of blood)?
- What is the highest predicted cost for the project (or probabilistically, what is the probability that the project will exceed the budget)?
Because answering these kinds of questions is so commonly the objective of a simulation, GoldSim provides a specialized element to specifically do this. It is referred to as an Extrema element. To understand how it works, let’s open up the Exercise we worked on in the last Lesson.
You should have saved a model named Exercise20.gsm. Open the model now. (If you failed to save that model, you can find the Exercise, named Exercise20_Overflow_Autocorrelated.gsm, in the “Exercises” subfolder of the “Basic GoldSim Course” folder you should have downloaded and unzipped to your Desktop.)
We are going to use an Extrema to compute the highest and lowest value of the Inflow. Make sure the model is in Edit Mode and insert an Extrema element (you will find it under the “Functions” element category). The Extrema element looks like this:
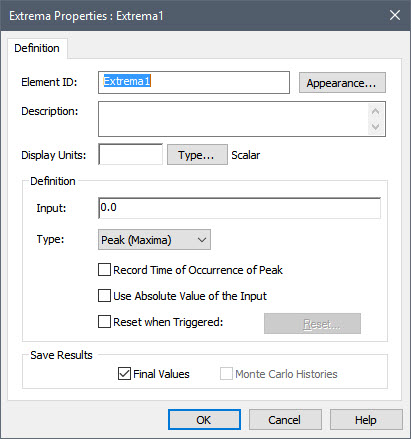
Let’s name this one “Highest_Inflow”. The Input is simply the output that we want the Extrema element to operate on, in this case, Inflow. The Display Units must be the same as the Input (which in this case are m3/day). The Type field determines whether the Extrema computes the “Peak (Maxima)” or “Valley (Minima)”. In this case, we will use the default: “Peak (Maxima)”.
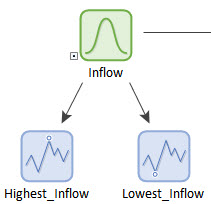
Close the dialog and copy and paste the Extrema. Name the new Extrema “Lowest_Inflow” and change the Type to “Valley (Minima)”. Close the dialog. You will note that the icon for the Extrema changes to reflect whether it is computing a Peak or a Valley:
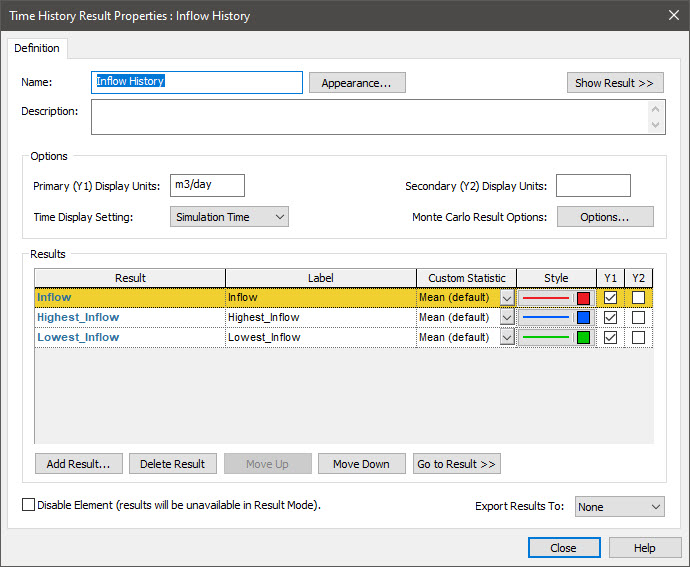
Finally, add the two Extrema elements to the Time History Result element that is being used to track the Inflow:
Now run the model, and display the Inflow History Time History Result element (Setting Display to “Realization” so you can view one realization at a time). It will look similar to this:

As can be seen, the two Extrema elements track the highest and lowest values encountered throughout the realization. At any given time, their value reflects the highest or lowest value encountered up until that time, and their value at the end of the realization reflects the highest or lowest value encountered during the realization. This last point is critical because it allows us to view probability distributions of the highest or lowest values.
To see why this is important, close this display, right-click on the Highest_Inflow, and select Distribution Result…:
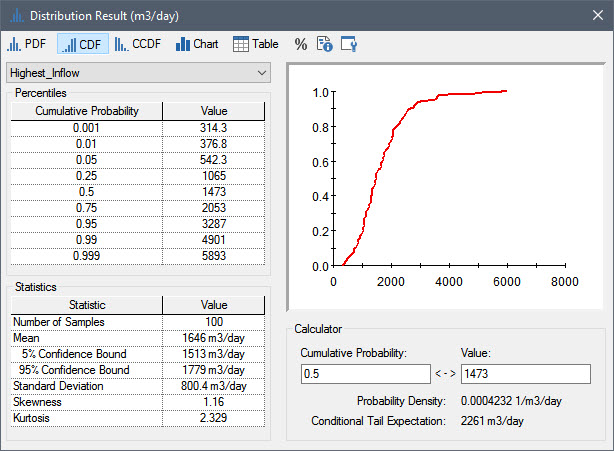
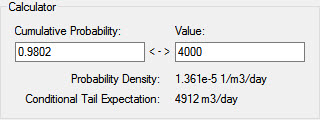
This is the distribution of the highest inflow. You can use this to answer the question: “What is the probability of the highest inflow ever exceeding X?”. For example, by typing 4000 for the Value in the Calculator, we could find that the probability of the highest inflow rate exceeding 4000 m3/day is about 2% (since there is a 98% chance of the value being less than 4000 m3/day):
This example should illustrate the power of the Extrema element, and why it is likely to be used in almost every model you build. Extrema elements also have a number of advanced features that we have not discussed here that you can read about in GoldSim Help.
Note: The Extrema element returns the highest "peak" or the lowest "valley" observed over the simulation. It is important to understand, however, that this value is a function of the timestep. For example, if (in the real world) a peak flow rate occurred over a period of 1 day, but you had a timestep of 1 month, that peak would be spread out over the entire month (i.e., the reported value would be lower than the actual peak). As a result, when trying to capture peaks (or valleys) it is important that the timestep is small enough to be able to resolve it.