Courses: Introduction to GoldSim:
Unit 16 - Documenting Your Model
Lesson 9 - Using Clones to Better Organize a Model
In Lesson 2 of this Unit it was pointed out that the most important way to ensure that your model is easy to explain and understand is to spend some time to organize your model. In this Lesson, we will introduce one of the more advanced topics in GoldSim (cloning), and show how this can be used to organize models and make them easier to understand.
We will start by explaining the concept of cloning an element.
Open a new model and insert a Data element. Name it A, and assign it a value of 3 (dimensionless).
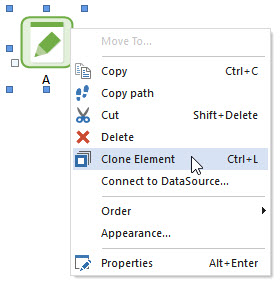
Next right-click on the element, and from the context menu, select Clone Element:
When you do so, you will be prompted for a Container for the element:
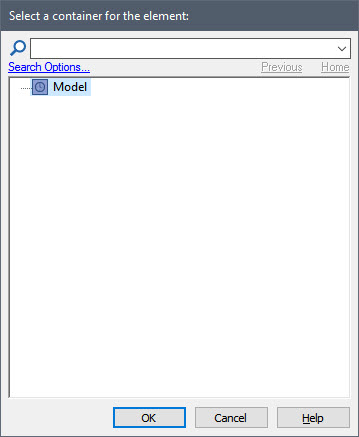
There are no other Containers in this model (other than the Model Container), so just press OK, and the element will be inserted. It will default to A_1. Let’s rename it as B. Now repeat the process, and rename the third element as C.
When you are done, you model should look something like this:
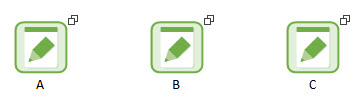
The first thing you will notice is that the three elements all have two overlapping squares on the upper right-hand corner of the element. This indicates that all three elements are clones. Now double-click on A to open up its properties dialog. You will note that it has an extra tab labeled Clones.
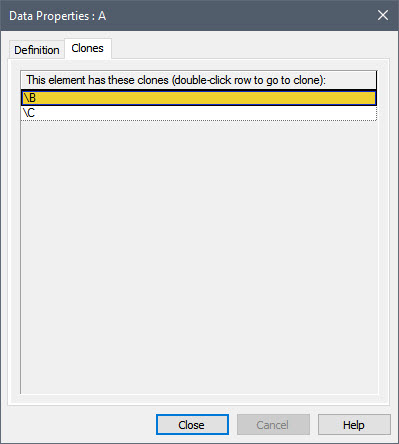
This tab simply lists all the clones of this element.
So what does it mean to be a clone? When you create clones of an element, all of the clones behave identically: if you change one of the inputs to a clone, the same input is automatically changed for all of the other clones. To see this, change the value of A from 3 to 5. Then open B and C (or hold your cursor over them). You will see that they are also automatically changed to 5.
All clones are "equal". That is, the original element is no different than the clone which was created from it. Both are clones, and if you change an input to one, the same input in the other is automatically changed accordingly. Once you create a clone, you can clone new elements from any of the existing clones. In our example, we cloned B from A. We then cloned C from A. When we did so, B and C became clones of A and each other. If we change any of the three elements, the other two would also be changed.
Now that we know what clones are, how can we use them to better organize our models?
To begin to understand this, let’s look at a model we first saw in Lesson 2:
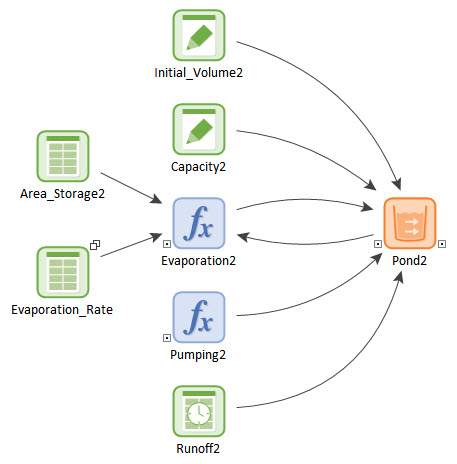
This was part of a model that consisted of multiple ponds. This is the sub-system for one of the ponds. You will note that the Evaporation_Rate (a Lookup Table) is a clone. Why? In this model the Evaporation_Rate represents the seasonal trend in the evaporation (it is multiplied by the area of the pond to compute the actual volumetric rate for the pond). Although the area changes for each pond, the Evaporation_Rate is the same for all ponds. So each sub-system needs to reference this same element.
Of course, we don’t actually need a separate element for each pond. We could have simply created a single element (and placed it at some higher location in the Container hierarchy). However, having an input element present exactly at the place it is being used can make the model more transparent and easier to understand.
Note: We could also accomplish this by simply copying the element to the Container representing each pond in the model, but if we ever needed to change the definition of the element, we would need to make the change to all the copies, and this could be time-consuming and would certainly be error-prone. Cloning the element solves this problem. If we change it in one location, it is changed in all locations.
Clones can also be used to better organize a model even in cases where the same element does not need to be referenced in multiple locations. The best way to see this is to open an example model. You will find it in the “Examples” subfolder of the “Basic GoldSim Course” folder you should have downloaded and unzipped to your Desktop. In that folder, open a model named Example35_Clones.gsm.
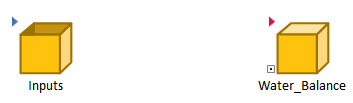
This model is actually a simplified version of the model we looked at in Lesson 2. At the top level of the model, we see two Containers:
First enter the Water_Balance Container, and then once inside, enter the Pond_2 Container:
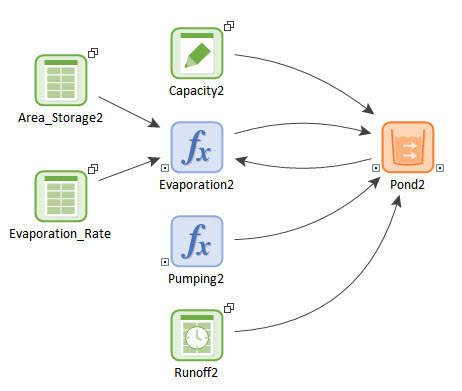
What you see here is that all of the input elements are cloned. If you look at the other Containers at this level (e.g., Pond_1, Pond_3) you will see a similar structure (with all of the inputs cloned). This is not, however, because they are used in other places in the model (e.g., Capacity2 is only used in one place). So why are the inputs cloned and where are the clones located? Go back to the top of the model, and enter the Inputs Container:
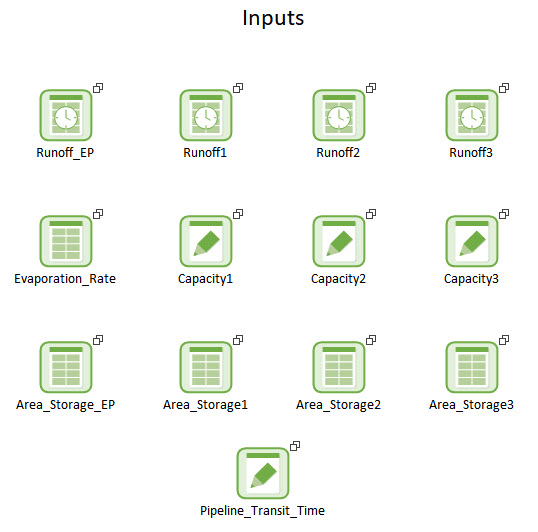
What you see here is that we have cloned all of the inputs to this Container. How does this help organize the model? First, all of the inputs are located in one place, making it easier to make changes to them all at once. Of course, we could have done this without cloning the elements. However, in that case, they would not be visible at the location where the inputs were actually being used. Having the inputs present at the location where they are being used helps to make the model more transparent and easier to understand. Using clones allows us to have the inputs in both locations.
Note: Because the Water_Balance model is localized, the clones in the two locations can have the same name. In fact, cloning is almost always used in conjunction with localized Containers, so this is typically the case.
Although this method of organizing your model by cloning input elements is not always appropriate for all models, hopefully this Lesson provides you with some ideas on how you can use clones to better organize your models.
It should be pointed out that cloning is actually a very advanced feature, and you can clone much more than simply input elements (e.g., you can clone an entire Container). However, these advanced applications of cloning are beyond the scope of this Course. You can, however, learn more about cloning in GoldSim Help.