Courses: Introduction to GoldSim:
Unit 4 - Building a Simple Model
Lesson 8 - Specifying Simulation Settings and Running the Model
Now that we have built the model, we are almost ready to run it. The last thing we need to do is specify how we want the model to be run. In particular, we need to specify how long we wish to run the model for, and what the timestep should be. We do this by defining the simulation settings.
- Open the Simulation Settings dialog by pressing F2. You can also open the Simulation Settings dialog by choosing Run | Simulation Settings from the main menu bar, or by pressing Simulation Setting button in the toolbar:

The dialog looks like this: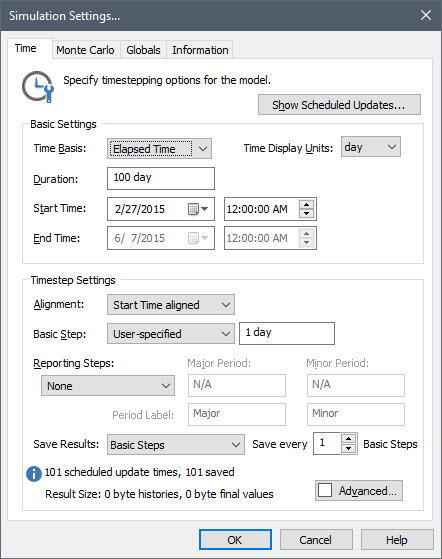
- The first thing we need to do is specify the Duration of the simulation. We said that we wanted to predict the water volume over the next several days. So let’s set the Duration to 72 hours (abbreviated as hr).
- In order to simulate how a system might evolve over time in a program like GoldSim, it is necessary to discretize time into discrete intervals referred to as timesteps. GoldSim then “steps through time” by carrying out calculations every timestep, with the values at the current timestep often computed as a function of the values at the previous timestep. The appropriate timestep length is a function of how rapidly the system represented by your model is changing: the more rapidly it is changing, the shorter the timestep required to accurately model the system. We will discuss this in more detail in a subsequent Unit. For now let’s use a timestep of 15 minutes. So for the Basic Step, enter 15 minutes (abbreviated as min).
Once you make these changes, the dialog should look like this: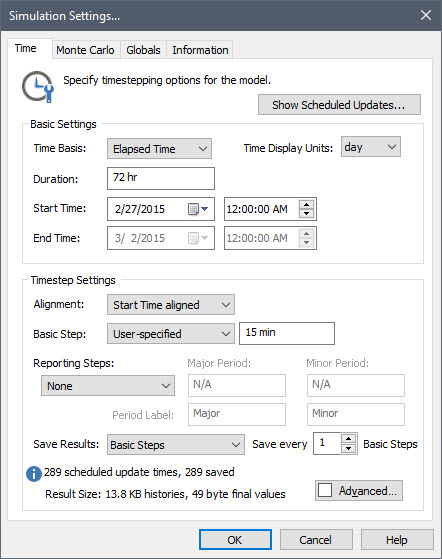
- Close the dialog by pressing the OK button.
Let's now run the model that simulates the tank filling up (and leaking).
- Press F5 or press the Run button on the toolbar:

GoldSim first checks to make sure the model is ready to run a simulation and if everything is OK, the model then immediately starts running. When the simulation finishes running, a “Simulation Complete!” message is displayed. (For this simple model, this takes a fraction of a second). - Click OK to close the message. The model is now in Result Mode (up until this point, it was in Edit Mode). Note that when a model is in Result Mode, GoldSim prevents you from making changes to the model that could invalidate the results (e.g., changing the structure of the model, or changing input values).
If you look at the graphics pane, you will note that all of the elements now display a small green box on the lower right-hand side of the element:
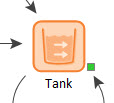
These are referred to as output ports. (You don’t need to worry about them for now, but they will be discussed in detail in a subsequent Unit.)